Building a fence involves more than you might think – there are so many options and styles to consider outside of the basic designs from old. When my husband and I needed to rebuild our own fence, we looked at all the possibilities. We knew we wanted something economical and easy to maintain, yet would still provide a unique look. As such, we decided to custom build a pressure-treated horizontal fence.
Horizontal fences – where the fence boards run horizontally instead of in the traditional, vertical manner – are becoming more popular and really add personality to a home. With the following tips and suggestions, you too can build a fresh, stylish fence that everyone will be in awe of.

Posts
With a horizontal
fence you need to really plan out your post spacing, which will, in large part, be based on the length of your horizontally oriented fence boards. In our case, we took 16-foot-long fence boards and divided our fence perimeter into even sections, leaving about seven-and-a-half feet from centre to centre of each post. This way we knew that the ends of the boards would line up on the centre of each post and provide an adequate surface area for fastening. We also left the posts higher than needed and trimmed them down to the finished height afterwards, so that each post would be exactly the same. The final post height was determined by the height of the horizontal boards, the number of rows and the spacing between the boards.

Frames
Once the posts were in their final position, we built frames within each post section to provide structure for the horizontal fence boards. You need to have enough structure in your frame to eliminate the possibility of the fence boards sagging or drooping over time. Our frame had a vertical two-by-six
foot board at the bottom so the lowest board wouldn’t get kicked in or damaged over time, thereby providing a solid backing. Additionally, two-by-four foot framing trailed around the perimeter, along with a centre vertical piece that provided the opportunity for additional screws to reducing sagging. We built these frames independently and then slid them in between the posts and attached appropriately.

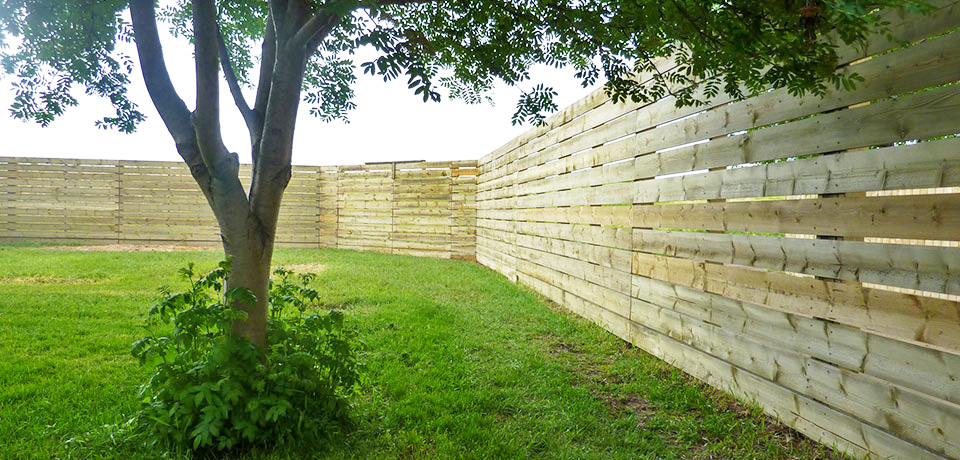
Fence boards
The most important thing to remember when installing horizontal fencing is that it must remain level. Horizontal fences, having fewer posts, more readily show installation errors. A level,
seamless look is the key to successfully pulling off a horizontal fence design. We started installing the horizontal boards from the bottom up and built spacers to keep the boards a consistent distance apart. It is important to have some space to decrease the wind load on the fence, which can shorten its
life span. With privacy in mind, however, we did want the boards as close together as we could. Each board was screwed to the posts and frames at every intersection to decrease sagging.

Gates
In our particular
case we needed to build two gates. The smaller of the two was to access the back alley. We had determined the gate’s location in the initial plan and intentionally placed a post on either side. We then built a frame like the
others, but made it undersized to allow it to swing freely between the posts. We installed the horizontal fence boards on the inside to line up with the boards to the right and left, then used patch hinges and a latch to finish it off. The second gate was for the front entrance, which was oversized and placed right next to the house. We wanted this gate finished inside and out, which added to the weight and complexity. We installed a fence post up against the house, built a frame to fit and attached a pivoting wheel to better swing the gate and hold some of its weight. The pivoting wheel makes opening and closing easier and also helps to prevent any potential sagging. We then placed horizontal boards on both sides of the gate.
Access panels
We wanted to have two removable panels to allow a trailer or vehicle to access the backyard. We had alley access and an angled section that made the most sense for location. So we built the two frames, horizontal boards and post so they’d all be easily removable with a few screws. This post was not set in concrete like the rest. We used a post collar that was set in concrete instead, with the post itself fitting into the collar.

Horizontal fencing is a great way to take your fence to the next level. You’ll be surprised at how many neighbours and passersby will compliment you on your innovative fence design, all just
from changing your fence boards’ orientation!