

Luxury Vinyl Plank (LVP) is a DIY dream floor because it's lightweight and easy to install. Simply prepare your subfloor, cut the LVP to fit and lay it in your desired pattern. Read on to walk through one of our recent installations.
Preparing the subfloor
Before starting any flooring project, it's important to properly prepare the subfloor. Replace all damaged or moisture-saturated parts of the subfloor, matching your new subfloor’s thickness to the sections that were removed. Screw the subfloor down to prevent movement and squeaks.
Fill large gaps with a patching compound to ensure the LVP stays level. We used Polyfilla by Lepage. Once it sets, vacuum the floors.
We primed and sealed the entire subfloor because it was porous particleboard, which could have absorbed our adhesive and swelled.
Pattern complexity, glue and you
There are many ways to lay your LVP, whether in a basic staggered plank or a more complex pattern.
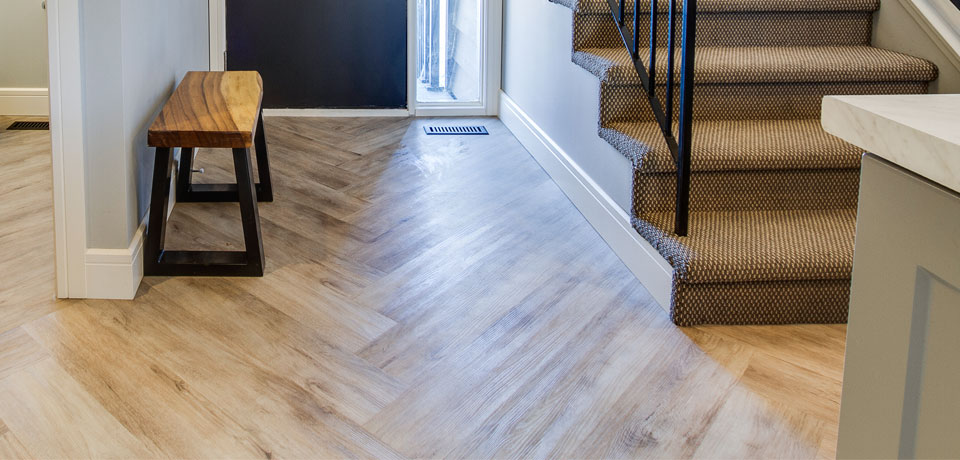
We chose to do a herringbone pattern with Co-op Prism loose lay LVP in Harvest to create an eye-catching conversation starter. Because of the pattern’s complexity, we decided to do a full glue-down application to avoid risk of any planks shifting and affecting the look.
Glue usually isn’t necessary when installing loose lay LVP in a more conventional pattern.

Mapping it out
Since our flooring covered a 1,000-square-foot space that encompassed the entrance, kitchen, dining room and living room, we couldn’t just start in one corner and work to the next. We divided the space into zones.
Final installation steps
Start laying your pattern in your first zone, cutting your planks with either a mitre saw or a jigsaw as you go along. Unless the pattern indicates otherwise, stagger joints by at least six inches in adjacent rows.
When laying LVP, it's very important to keep the joints tight and straight. If one piece is slightly off, the entire pattern will continue to get more out of line as you go, especially if the pattern is complex like herringbone.
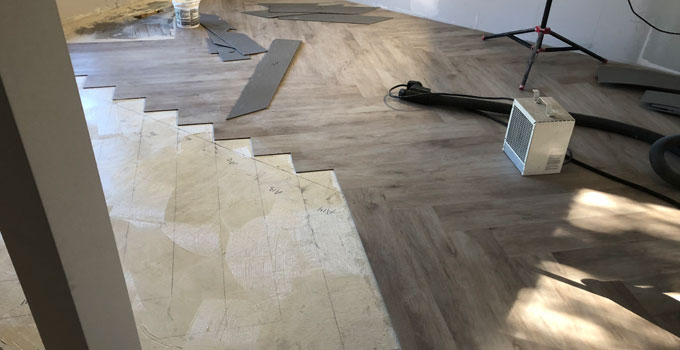
Because we were gluing down our herringbone pattern, it required some extra installation steps. As we laid the pattern in the first zone, we traced the pieces on the floor, then numbered both the floor and the planks to note which piece went where. Then, we set the planks aside, stacking them in numerical order.
We applied glue to the floor where the planks were going to be installed, letting it tack up or "flash." Then, we laid the pieces back into their pattern and repeated this process for each room within our work area. Once the LVP was installed in an area, we rolled it with a 100-pound flooring roller for improved adhesion.
Loose lay LVP is a great flooring solution for almost any room and any DIY skill level. Follow these tips and read our other articles for more exciting LVP information.