

Materials Checklist
- Wash bucket
- Mild dishwashing soap
- Cellulose sponge
- Painter’s tape
- Flexible putty knife
- Primer
- Plastic paint container
- Roller pan/tray
- Paint stir sticks
- 2-inch to 3-inch angled sash paint brush
- Paint roller
- Paint roller covers (3/8-inch to 1⁄2-inch nap thickness for smooth surfaces. 1⁄2-inch to 1-inch nap thickness for rough or stippled surfaces)
- Paint roller extension pole
- Paint rags
- Ladder
- Acrylic caulk
- Caulk gun
Before you begin:
Before performing the following wall preparation steps, you should have already removed all loose paint and patched any holes or cracks in your walls.
Step 1: Washing Walls
Washing your walls and trim will remove grime, cobwebs, dust and stains that can prevent your paint from adhering.
Use a mixture of lukewarm water and mild soap, gently rubbing in a circular motion.
Rinse your walls using a slightly damp cellulose sponge.

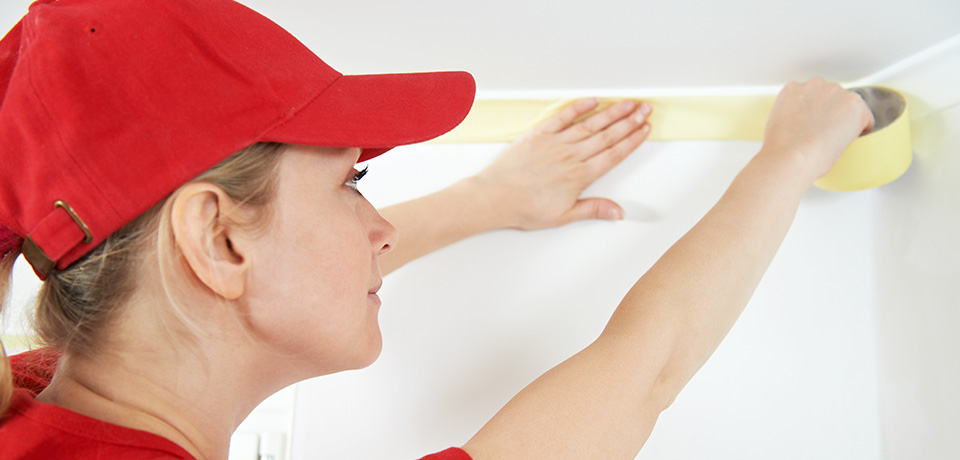
Step 2: Taping
Quick Tip: Check that your walls and trim are thoroughly dry before applying painter’s tape to your trim.
Use longer pieces of tape rather than several shorter pieces. Minimizing the possibilities for gaps in your tape helps ensure your paint won’t sneak through.
Start in a corner, pressing the trim in small sections as you go. Using a clean putty knife, press the tape’s edges to the trim so your tape sticks firmly. This will help ensure you get a nice, even paint line.
Step 3: Drop Cloths
Use one or more drop cloths to protect your flooring and furniture from paint drips. Canvas drop cloths are the most durable and the fabric works to absorb paint drips and spills. Reuse over and over.
Plastic and paper drop cloths cost less but tend to slide when you walk on them, so use painter’s tape to secure the edges to the floor.

Step 4: Priming
Primer isn’t just to cover up old paint and imperfections. Starting off with a primer base helps you get the true colour and sheen you’re looking for from your paint. Plus it provides a layer specially formulated to protect your topcoat.
Using a 2-inch or 21⁄2-inch angled bristle brush, paint a narrow strip of primer all along your trim and the inside corners of your room.
Prime the remainder of your wall with a roller. Use a 3/8-inch to 1⁄2-inch nap thickness for smooth surfaces. Use a 1⁄2-inch to 1-inch nap thickness for rough or stippled surfaces.
Quick Tip: Painting your room in a darker colour? It’s best to use a tinted primer rather than white.
Step 5: Caulking
Bothered by small gaps between your moulding and wall? Fill them with an acrylic caulk after priming the wall and trim surface. Some caulks are paintable but others are not, so make sure you read the label.
Use the little hole in your caulk gun handle to cut the tip of the tube at a 45-degree angle. Carefully pierce the inner seal inside the tip using the seal puncture tool found on most caulk guns.
Load the tube into your caulk gun and squeeze out a small amount to start the flow. Have a damp cotton rag handy to clean up excess caulk.
Starting in one corner of your room, point the caulk tube tip into the crack, and gently squeeze an even flow of caulk along the crack.
Wet your finger and use it to smooth out and remove excess amounts of caulk. Have a damp cloth handy to wipe your finger clean.
Quick Tip: Check out the caulk label for dry time so you know how long to wait before you can paint.