

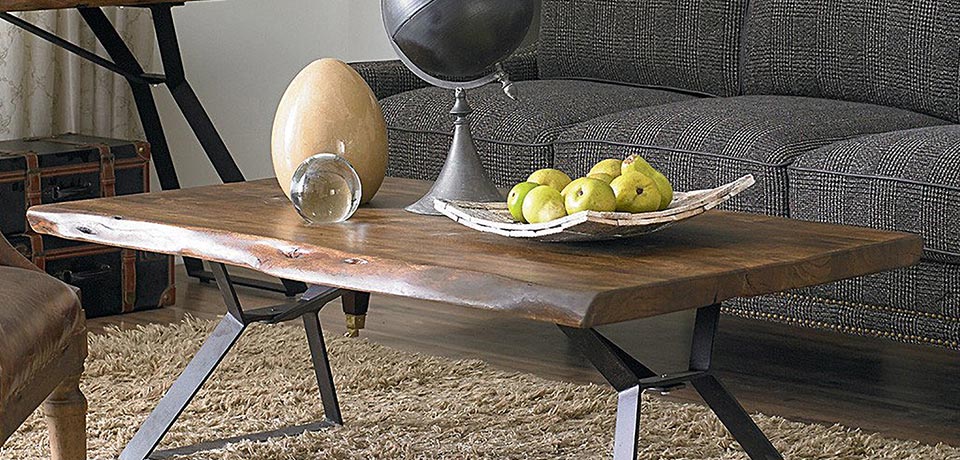
Live edge wood, with its natural rustic features and long-lasting qualities, has become one of the hottest design trends in modern home décor.
The thick slabs, with or without bark, make any piece of furniture look sturdy, durable and luxurious – serving as the perfect focal point in any room. What might surprise you is that DIY-ing your own live edge furniture is easy and can be completed in as little as two days.
Follow the steps below and create a stunning piece of furniture that will make a rustic, yet refined, design statement.
Before you get started on your project, you’ll need the following materials:
- Live edge wood
- Wood conditioner
- Wood stain in the colour of your choice
- Polyurethane
- Optional: wood filler
- Optional: Table legs or plumbing pipe (if you’re creating furniture)
- Optional: spray paint (to make the pipe/legs uniform)

STEP 1: Prep
Inspect your wood. If the wood you selected has large cracks or imperfections you will want to fill those in. Use a high-performance filler to fill cracks and adhere loose bark. A good product for this purpose is Minwax Wood Filler. Once all the cracks are filled and bark is adhered, sand the surface to ensure it is smooth and ready for the wood conditioner and stain.

STEP 2: Condition
Conditioning is only required if using a stain. If you are staining, use an oil-based conditioner to treat and stabilize moisture content. Brush on the wood, including over the end-grain and bark surface, keeping it moist for five to15 minutes. Wipe off any excess.

STEP 3: Beautify
To beautify the wood, use an oil-based stain, such as Minwax Wood Finish. The colour you choose is a matter of personal preference. You can go dark for an elegant, modern look, or choose a natural stain that simply enhances the existing appearance of the wood. Make sure you apply wood finish within two hours of applying conditioner.
To apply the stain, first brush on a liberal amount in smooth, even strokes in the same direction as the wood grain. Let the stain sit and absorb into the wood for at least five to 10 minutes before wiping it off with a clean, dry and lint-free rag. The longer you let the wood absorb the stain, the darker and richer the colour will be. DO NOT let the stain dry before wiping it off, and be sure to wipe off in the same direction as the wood grain.
For best results, apply two to three coats of stain. This will achieve the richest, truest colour. After the first coat, wait four to six hours before applying the next coat. When applying stain, always test your colour on the bottom side of the wood to make sure you like it.

STEP 4: Protect
Apply your choice of topcoat. Options include hand-rubbed oils or oil-based, water-based or hybrid polyurethanes. The topcoat choice depends on the desired look you want. Be sure to use an exterior, clear coat if the finished project will be housed outside or in direct sunlight. To keep the wood from drying out, be sure to add at least one coat to the underside of the wood.
Pro tip: A thicker topcoat does not mean more protection. When applying a clear topcoat, make sure it’s smooth, even and not too thick. Thick topcoats can create air bubbles.

STEP 5: Furnishing your piece
Once the topcoat is dry, you’re ready to add the final furnishings – legs, pipes, etc. – and display your one-of-a-kind piece.
If you are looking to create a live edge table or piece of furniture, you can either use pre-built legs or assemble plumbing pipes. If you do use plumbing pipes, they may be different colours and not uniform. To solve this issue, purchase a can of spray paint in black (gloss, satin or matte, depending on the look you’re going for) – such as Krylon ColorMaster – and spray all of your furnishings to match. Once dry, assemble the legs and then screw them into the live edge wood slab.

Voila! You’ve created your very own live edge furniture for all to admire – and no one will know how easy it was for you to make it!